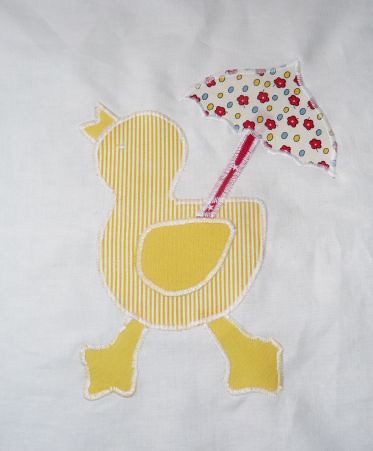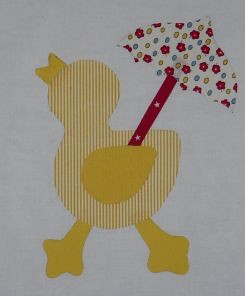
Here is the duck appliqued:
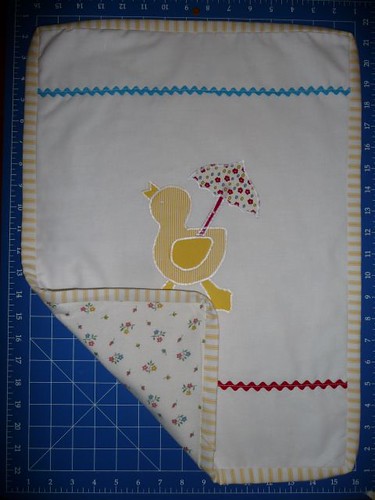
And here is the finished dolls quilt:
OK, wow, a project completed within a matter of weeks - awesome! I recycled some flannelette sheeting for the backing which came from MIL.. it was nice to use something with a bit of history.
Saturday, December 13, 2008
Saturday, November 29, 2008
Slowly does it.
Wow, I have had a very busy sewing day today. My main project was to make a library bag - I used a beautiful lightweight denim that I bought at the fabric store today. It really is a gorgeous fabric to work with - really smooth and soft. I made a basic little applique for the front and I may just gift it to one of the boy's in my mothers group - I have been wanting to make something for the kids and this would be my first chance.
Then I finished off the stitching on some appliqued tshirts that I made a little while ago. It was slow and steady all the way as I find applique stitching really difficult. Isn't all stitching difficult? ;)
I will give a sneak peak of my final project for today and shall update again soon.
Then I finished off the stitching on some appliqued tshirts that I made a little while ago. It was slow and steady all the way as I find applique stitching really difficult. Isn't all stitching difficult? ;)
I will give a sneak peak of my final project for today and shall update again soon.
Yum.. been cooking..
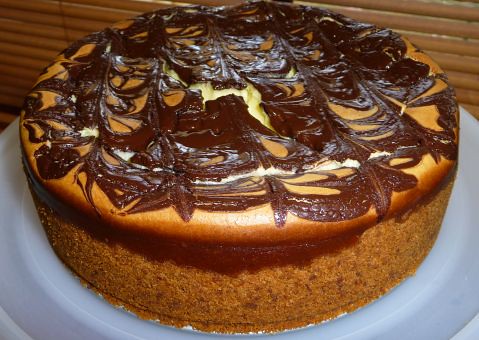
Last week I finally had some energy back and I did some cooking. I made a baked cheesecake from the latest Good Food magazine which turned out absolutely divine. I love baked cheesecake! I also made a lovely chicken korma curry from the Jamie Oliver Ministry of Food book (sorry, no pic) over the same weekend. I am not a brilliant cook, so this was quite an achievement for me. It ended up totally delicious and I would highly recommend this book to any starter cooks.
Saturday, November 8, 2008
Three Wishes
Surprise! Yes, I'm still here and I apologise profusely to anyone who's been after an update from me. We've been through a few ups and downs which have kept us very busy. I am bursting to share this - we are pregnant with our second child - very excited about this, I can tell you! I am currently 16 weeks, and I just started to get my energy back the week of Boo's birthday which was a godsend as there was so much to do!
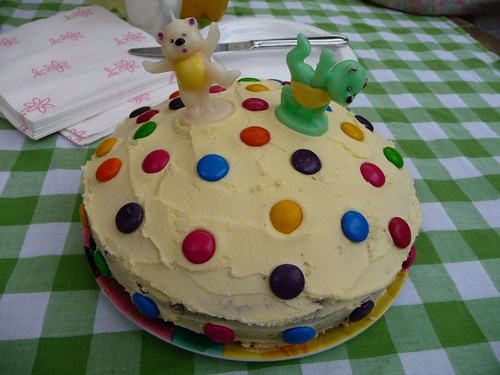
We wound up having four cakes for Boo's birthday -- she is seriously partied out!! :) She needed a cake for Day Care, a cake for Mothers Group, a cake with the family on her birthday and a cake for the party we had on the Saturday. Boo had taken an attachment to birthday cakes and candles at her niece's birthday in August and had started to learn the birthday song and practice blowing out the candle at the end. She did a brilliant job blowing out the candles on her cake(s)!
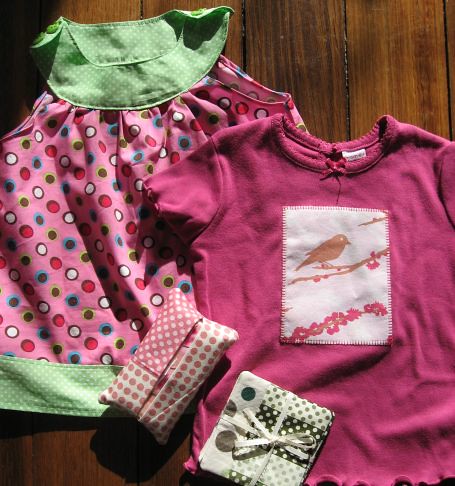
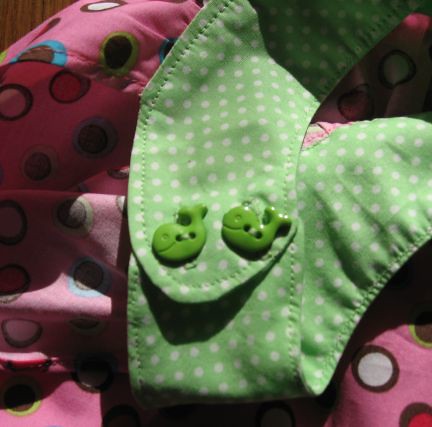
The most I have done in regards to sewing over the last few months is to have sewn a new zipper into one of our couch cushions. We did receive a lovely PASS IT ON parcel from Karen The package revealed a beautiful tunic top for Sarah to wear, along with an appliqued tshirt, a tissue holder and a set of fabric coasters. The colour combinations are fantastic, the stitching is perfect and the detail is absolutely amazing. The little whale buttons are just the cutest thing (see detail below). So a very big thankyou to Karen for such a wonderful treat! Boo insisted that she get to wear the top straight away, so over all her clothes it went!
Friday, August 8, 2008
Sunday, August 3, 2008
A new cushion
Sunday, July 27, 2008
Do-ing
OK, I was going to go to the Craft Fair . Its a FABULOUS fair - my favourite in Melbourne. But at the last minute I decided I would be better of to spend the time working on some crafting/sewing using LAST year's fabric purchases rather then buy a whole heap of new fabric to sit and waste away in my cupboards. So the theme here is to get something done!
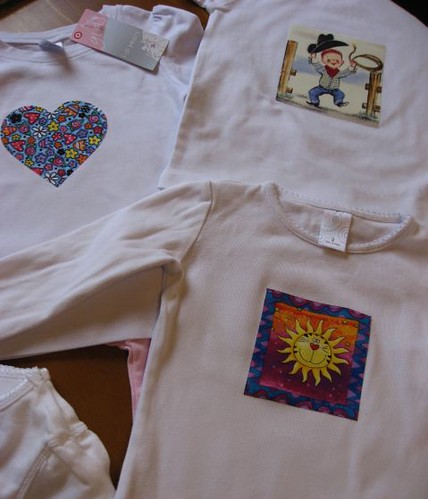
We have a few birthdays coming up and I've had the idea of making up some tshirts for the Mothers Group kids. To my great horror, I canNOT find my craft book within which I have stored all my GOOD IDEAS! No tears were shed, I just tried to think up some NEW ideas. I've wound up going very basic for these applique designs - just using pictures already within the fabric and a simple heart shape. In this photo they are not yet appliqued.. I will get to the sewing in the evening.
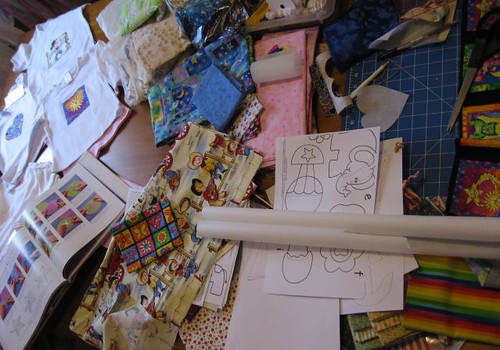
And just for a bit of fun, here is a piccie of the dissarray that is my dining table right now while doing all this creativity. To make these 3 simple tshirts, I had to go through this:
Tuesday, July 22, 2008
Pay It Forward Winners
Beach
Saturday, June 28, 2008
Sewing Update
I've been so sleep deprived of late that my last few baking posts have been the most creative pursuit that I've been able to concentrate on. Boo has been sick with a cough, then an ear infection and has been up in the night for about the last 4/5 weeks. She is all good this week and I've finally gotten some sleep which has been an absolute godsend.
The few times that I've attempted some sewing, I've seriously mucked up what I've been working on. One thing has been a cute little pinafore dress for the doll's I'm making. The dress required some buttonholes and I had to do 3 takes before I managed to get it right. Thank goodness that the clothing pieces are so small! Now I have to try and find some nice buttons that will coordinate with the other clothing before I can take a photo. The other item is the baby quilt that I've been making. I have *tried* but my quilting is so incredibly dodgy, I really think I have mucked the whole thing up. I am pretty sad about that. I don't know if it is *me* that is the problem or if there is something wrong with my machine. I have a feeling the material should just glide past the needle but my experiences have been horribly clunky... I suspect it is more my level of patience though!
The most exciting thing thats happened to me in a long while was when I was visiting a fabric shop a few weeks ago and encountered a filming session of the Australian "Project Runway". They allowed me to enter the store while they were filming. It was pretty exciting stuff to see the crews of people around each of the "stars". I was pretty strapped for time and really just wanted to get some interfacing and get out of there though! If I wind up in shot in the background, I hope I don't look too ungrateful! The store I was at was Rathdowne Remnants on Victoria St in Brunswick(?). Its about a block from AJ Fabrics on Lygon St. They have an array of fabrics - I particularly like the denim, corduruoy and suiting fabrics. They also have a small selection of quilting fabrics (very small - don't go just to see quilting fabrics!). The staff there are fantastic and the prices are really good. They stock a good selection of haberdashery which is heaps cheaper then SL.
Friday, June 27, 2008
Muesli Slice
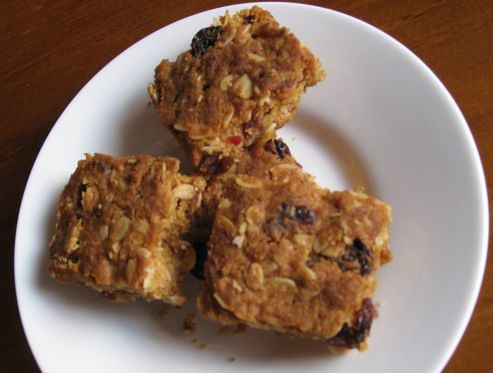
This is a very yummy muesli slice that I have made twice in a manner of weeks. It is that good!
I've taken the Recipe from the Women's Weekly Babies and Toddlers cookbook and made some modifications.
Muesli Slice
125g butter
1/3 cup firmly packed brown sugar
2 tablespoons honey
1 cup rolled oats
1/2 cup dessicated coconut
1/2 cup sultanas
1/2 cup dried cranberries (craisins)
(original recipe asks for 1/2 cup each of chopped dried apricots, dried apples, sultanas)
1/2 cup self raining flour
1. Combine butter, sugar and honey in a large saucepan; stire over medium heat, without boiling, until sugar dissolves. (I microwave butter and sugar). Remove from heat; stir in remaining ingredients.
2. Press mixture into greased and lined 20x30cm pan. Bake, uncovered, in moderate oven (170C fan forced) about 20 minutes or until golden brown. Cool in pan; cut into squares to serve.
Saturday, May 31, 2008
Fun in the kitchen
Tuesday, May 13, 2008
Hot Pink
Happy Mothers Day to all the Mums out there. Aren't hand made presents WONDERFUL??! Boo's childcare made up a little plaque with her handprints and a photo of her on it and I absolutely adore it. I will treasure that one forever.
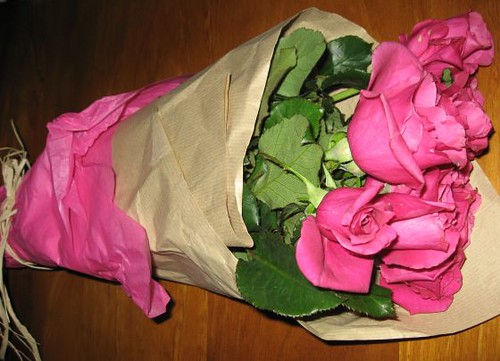
Here are some beautiful flowers that I received:
I have been back working on the baby quilt. I think I am doing something wrong with the quilting part.. the lines aren't straight, the stitches just don't look nice and there is so much puckering.. sounds ominous doesn't it? Hope I'm not scaring too many quilting people..
Monday, May 12, 2008
About Time!
Okee.. I have been a bit slow in popping this on my blog b/c I was waiting until my blog hit the stratosphere and had won a few awards.. Ah-huh.. not likely! So... after winning Karen's Pay it Forward a while back, I am finally putting my own Pay It Forward up. The PIF goes as follows:
"I will send a handmade gift to 3 random people who leave a comment on this blog post. I don’t know what that gift will be yet and you may not receive it tomorrow or next week but you will receive it within 365 days, that is my promise! The only thing you have to do in return is pay it forward by making the same promise on your blog."
Saturday, May 3, 2008
Hand Quilting Lesson
Just recently, I attended a lesson on hand quilting. There were six of us and we sat around working on our stitching and had a lovely little chat about many things. It was so nice and casual and relaxed, as any get together should be. Here is a picture of my piece of hand quilting including the basting stitches that are weaved through the piece in purple. I didn't get very far and have not sat down with it since. I'm amazed at what an art form hand-quilting is. You have to move the tiniest little needle in a special rocking motion in order to get through the batting and to create the smallest stitches possible. You have to get used to using a thimble or you will wreck your fingers. All, in all, a lovely day out!
Special fabrics
I have received some thrifted sheets which I think are absolutely adorable.
I also received the following three aprons. I will keep the second one in the stack as an apron - its a gorgeous shape/design. I'd really like to make something with the fabric from the first. I am thinking of making a case with it or maybe keep it simple and just edge it as a tea towel. There is not very much usable fabric so it will be a challenge.
Beautiful Knots
I have been so inspired by the wonderful knitting on blogs like retromummy and Kylie's, that I have bought some wool and knitting needles! I went to the Bendigo woollen mills as recommended by retromummy. This is my sampler. My mother in law helped me get the hang of it. She is a fabulous teacher and taught me how to read a pattern so that I can get started on a project. I am going to start off knitting a hat which will hopefully be sized right to fit Sarah. She desperately needs a hat for winter. I have been looking in the shops and have not seen many winter hats which is disappointing but which is good as its motivating me to have a go at making one of my own.
Friday, April 18, 2008
Doll's Basket/Bassinet Tutorial
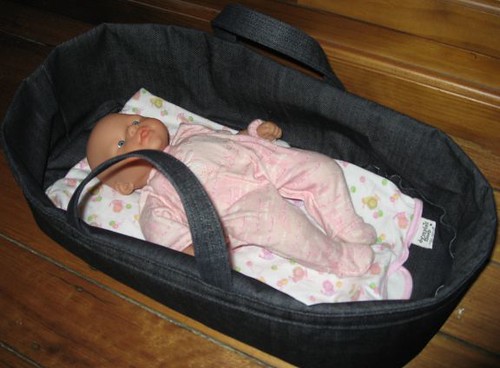
This doll's basket is very easy to make. I've used the pattern from an old Family Circle sewing book ("Family Circle Treasury of Dolls & Cuddly Toys"). The instructions weren't very clear and caused me to make a jumbled mess before I realised where I was going wrong. I've now re-written the instructions and taken lots of photos while making the basket and I hope someone might find it useful. If you do use it, please drop me a line and show me your basket!
Materials:
I used denim and the book recommends garbardine.
Cut 1, 136 X 30cm piece of material for basket sides & matching interfacing
Cut 1, 136 X 4.5cm piece of material for reinforcing strip
Cut 2, 30 X 10cm handles
Cut 2, 52 X 27cm rectangles of material to form the base of the basket. The material base will have a 1cm seam allowance bigger then the masonite/cardboard base. The corners need to be curved.
Cut 1, 50 X 25 rectangle of heavy cardboard or masonite to use as the base of the basket. You will need to round the edges.
Step 1 - Cut out the basket pieces. Use heavy-weight interfacing on the basket panel as you will want the basket sides to be strong enough to stand up on their own.
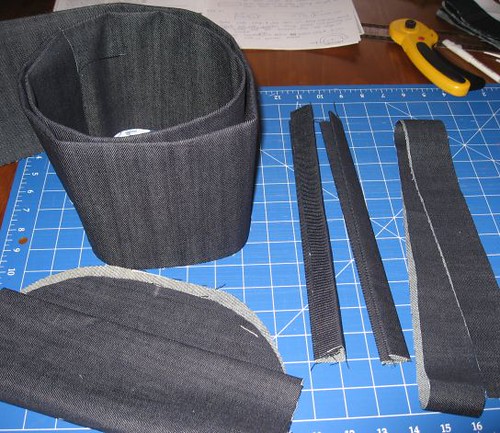
Step 2 - Fold the handles in half and then fold each edge into the middle to create a casing. Iron these edges. Sew along the length of each handle a number of times to reinforce them.
Step 3 - Fold the basket side in half and iron it to mark a line that we will work off for the rest of the tutorial. Unfold the basket side panel and lay it flat on your work area. Allow for a 1 cm seam line at each end of your length of fabric, then mark half and quarter markings along the length of the fabric.
Step 4 - Sew the handles 6 cm on either side of the quarter markings and 1 cm below the fold line. Reinforce the handle stitches as you see fit.
Step 5 - Take the reinforcing strip and fold it in 1 cm on either side. Lay the strip right sides facing onto the basket side and match the upper reinforcing fold line with the basket side fold line. Sew this edge to the basket so that it will then fold down and meet up with the basket side fold line (and hence the top of the basket edge when everything is folded down later on).
Step 6 - Turn the reinforcing strip down and then sew the bottom edge of the reinforcing strip to the main basket.
The unit should look as follows:
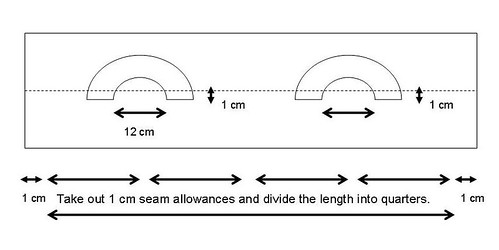
Step 7 - Pin the edges of the basket panel together to form a large circle. With right sides together, sew 1cm from the seam.
Step 8 - You will work with everything inside out for the next few steps. Open the basket panel and place upright on the table to create a circular shape. Take one of the basket bases and pin it to the bottom part of the basket panel (the handles will point to the top of the basket, so the other end is the bottom). I marked quarter marks around the basket sides and around the basket base to help me distribute the base evenly. Sew all the way around - right sides are facing. Use a 1cm seam allowance. This part will become the basket's "outer" wall and base.
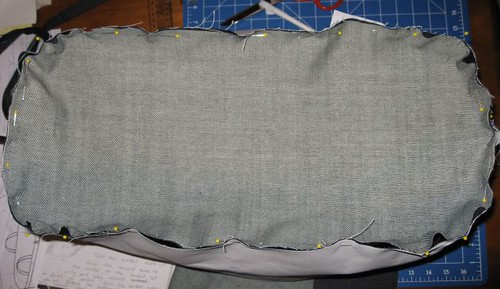
Step 9 - Turn the unit over and pin the other basket base to the top part of the basket wall. Only sew half way around this end. This part will become the basket's "inner" wall.
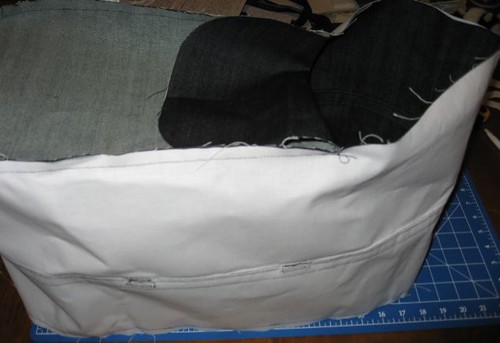
Step 10 - Turn the basket inside out by pulling the fabric through the hole you have left while sewing the base. Do you remember how we put a fold in the basket walls at the very beginning? Now you can use this fold to create the sides of the basket. You now have an outer and inner part to the basket.
Step 11 - Insert your piece of cardboard or masonite into the base of the basket. Hand stitch the opening in the inside of the basket closed.
Step 12 - Well done! You have finished your doll's basket!
Busy Bee
OK, a bit of a catch up. There has been a birthday party - see pic. We managed to fit 9 people around our dining table which is the largest number of people we've ever had around it!
We have been busy doing some painting. Our lounge and dining were a glorious shade of orange when we moved into the house and its taken us near on 2 years to get that colour painted out. Admittedly we've been pretty busy fumbling our way through Boo's first year! So this is our new lounge room. To go from a dark colour to a very light colour really did make the room feel twice as big afterwards. I've always thought it very cute when bloggers snap their work and find "little helpers" in the shot afterwards. Boo, right on cue, grabbed a toy I'd cleared away and zoomed into shot.
Here is a teaser for a project I am working on. I've used some very heavy-weight interfacing for this project and I am wondering if I need to go and buy some stronger sewing needles before I start sewing.
I have another teaser for something special that I am doing tomorrow.
Thursday, March 27, 2008
Muscling in on the action
Wednesday, March 26, 2008
My first bag
I am DIZZY with excitement at having made my first bag! Whoop-de-dee!!!
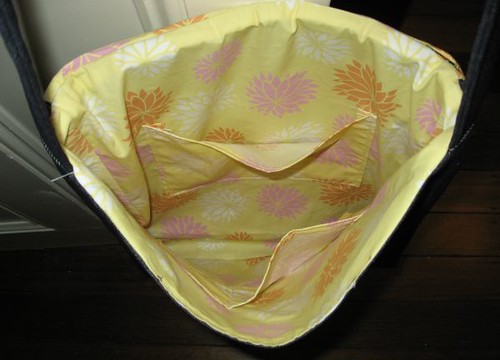
The most exciting thing is opening it up to see the lovely pockets that are included in the inside of the bag! I made them!! To *my* specifications!! Admittedly I'm not too specific as I just cut some rectangles and bunged them on! ;)
And here is the inside of the bag with my mobile phone in the "phone slot" and a space for my glasses and keys. Am I the only one incredibly excited at the thought that I can just make up my own pockets to go ANYWHERE I WANT rather then being confined to some other bag makers idea of where I should put my stuff? OK.. shall calm down now. :D
I followed a mix of instructions to make this bag. I intially had the Amy Butler Messenger bag pattern but I decided I did not like that the bag closure was narrower then the actual bag. I found these instructions at craftster which was more of the type of bag I wanted, so I loosely followed those instructions and referenced the AB pattern for when the craftster instructions weren't quite clear (bag straps and inserting the lining - I had already sewn the lining together so AB's turning out instructions worked better).
I have used a stretched denim and a nasty print from SL. The print is definitely a polyester blend and it was horrible to work with for this type of project. The material seemed to stretch when I ironed it which meant that when I put iron-on interfacing onto it, it then warped when it cooled! There wasn't much I could do about it. I soldiered on but would definitely only use cottons in the future.
Subscribe to:
Posts (Atom)