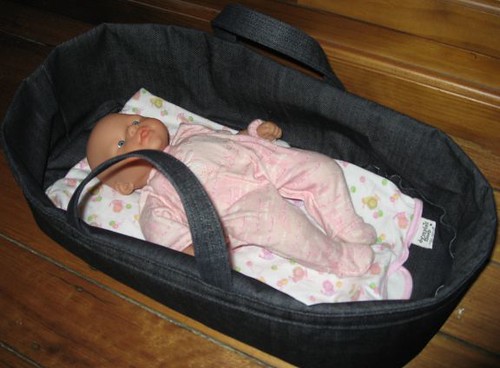
This doll's basket is very easy to make. I've used the pattern from an old Family Circle sewing book ("Family Circle Treasury of Dolls & Cuddly Toys"). The instructions weren't very clear and caused me to make a jumbled mess before I realised where I was going wrong. I've now re-written the instructions and taken lots of photos while making the basket and I hope someone might find it useful. If you do use it, please drop me a line and show me your basket!
Materials:
I used denim and the book recommends garbardine.
Cut 1, 136 X 30cm piece of material for basket sides & matching interfacing
Cut 1, 136 X 4.5cm piece of material for reinforcing strip
Cut 2, 30 X 10cm handles
Cut 2, 52 X 27cm rectangles of material to form the base of the basket. The material base will have a 1cm seam allowance bigger then the masonite/cardboard base. The corners need to be curved.
Cut 1, 50 X 25 rectangle of heavy cardboard or masonite to use as the base of the basket. You will need to round the edges.
Step 1 - Cut out the basket pieces. Use heavy-weight interfacing on the basket panel as you will want the basket sides to be strong enough to stand up on their own.
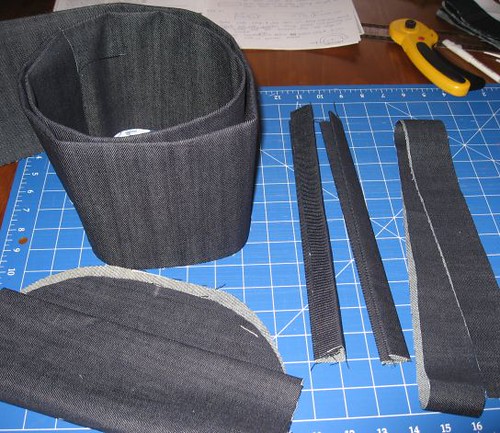
Step 2 - Fold the handles in half and then fold each edge into the middle to create a casing. Iron these edges. Sew along the length of each handle a number of times to reinforce them.
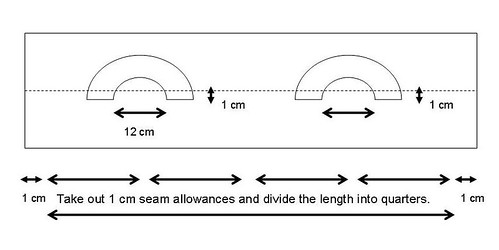
Step 3 - Fold the basket side in half and iron it to mark a line that we will work off for the rest of the tutorial. Unfold the basket side panel and lay it flat on your work area. Allow for a 1 cm seam line at each end of your length of fabric, then mark half and quarter markings along the length of the fabric.
Step 4 - Sew the handles 6 cm on either side of the quarter markings and 1 cm below the fold line. Reinforce the handle stitches as you see fit.

Step 5 - Take the reinforcing strip and fold it in 1 cm on either side. Lay the strip right sides facing onto the basket side and match the upper reinforcing fold line with the basket side fold line. Sew this edge to the basket so that it will then fold down and meet up with the basket side fold line (and hence the top of the basket edge when everything is folded down later on).

Step 6 - Turn the reinforcing strip down and then sew the bottom edge of the reinforcing strip to the main basket.


The unit should look as follows:
Step 7 - Pin the edges of the basket panel together to form a large circle. With right sides together, sew 1cm from the seam.


Step 8 - You will work with everything inside out for the next few steps. Open the basket panel and place upright on the table to create a circular shape. Take one of the basket bases and pin it to the bottom part of the basket panel (the handles will point to the top of the basket, so the other end is the bottom). I marked quarter marks around the basket sides and around the basket base to help me distribute the base evenly. Sew all the way around - right sides are facing. Use a 1cm seam allowance. This part will become the basket's "outer" wall and base.
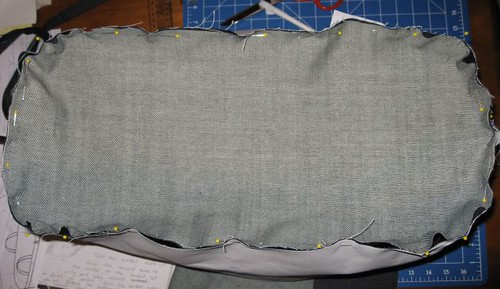
Step 9 - Turn the unit over and pin the other basket base to the top part of the basket wall. Only sew half way around this end. This part will become the basket's "inner" wall.
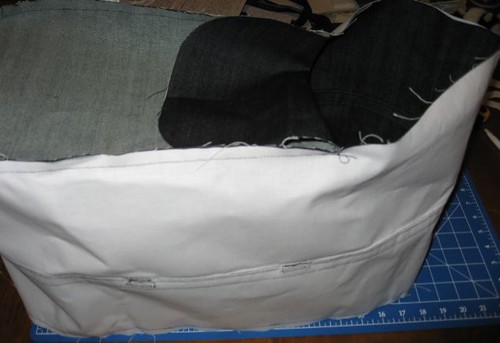
Step 10 - Turn the basket inside out by pulling the fabric through the hole you have left while sewing the base. Do you remember how we put a fold in the basket walls at the very beginning? Now you can use this fold to create the sides of the basket. You now have an outer and inner part to the basket.

Step 11 - Insert your piece of cardboard or masonite into the base of the basket. Hand stitch the opening in the inside of the basket closed.

Step 12 - Well done! You have finished your doll's basket!


